
Desserts
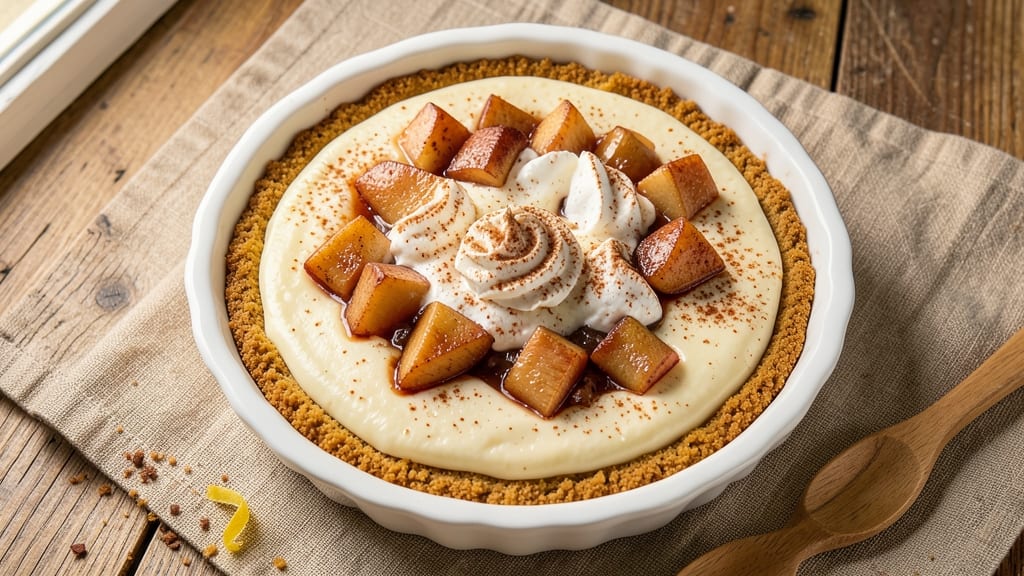
This apple pie filling cheesecake recipe merges two iconic desserts into one decadent masterpiece—creamy cheesecake layers swirled with spiced apple filling. The secret lies in balancing the tangy sweetness of the cheesecake with the warm cinnamon notes of the apple filling, creating a texture that's both velvety and lightly crumbly.
I perfected this recipe after years of experimenting with layered desserts, and it never fails to impress at gatherings.
The beauty of this dessert is its foolproof technique—no fancy equipment required. You'll start with a classic graham cracker crust, then layer a silky cheesecake filling that's been baked to perfection.
The apple pie filling, cooked down with cinnamon and a touch of brown sugar, gets swirled into the cheesecake batter before it sets, creating those signature marbled patterns. The result? A dessert that looks as impressive as it tastes.
What makes this recipe truly special is the harmony of flavors—each bite delivers the creamy richness of cheesecake followed by the comforting warmth of spiced apples. The crust adds a buttery crunch that contrasts beautifully with the soft layers above.
Whether you're serving it at a holiday dinner or simply treating yourself, this dessert is guaranteed to become a new favorite.
For an extra touch of elegance, consider drizzling a caramel sauce over the top or dusting with powdered sugar. The combination of textures and flavors makes this the ultimate dessert for any occasion. Let's get started on creating this showstopper!
Ingredients for apple pie filling cheesecake
Eight servings of decadent apple pie filling cheesecake—creamy layers swirled with spiced apples. No fancy tools, just perfect balance.
| Ingredient | Amount | Notes |
|---|---|---|
| Graham Cracker Crumbs 🍪 | 2 cups | For buttery crust texture |
| Unsalted Butter 🧈 | ½ cup | Melted, full-fat preferred |
| Granulated Sugar 🍚 | 1 ½ cups | White sugar for sweetness |
| Cream Cheese 🧀 | 32 oz | Room temperature, full-fat |
| Large Eggs 🥚 | 4 whole | Room temperature, beaten |
| Sour Cream 🥛 | ½ cup | Full-fat for creaminess |
| Vanilla Extract 🌿 | 2 tsp | Pure vanilla preferred |
| Apples 🍎 | 4 whole | Peeled, cored, diced |
| Brown Sugar 🍚 | ½ cup | Packed, light brown |
| Ground Cinnamon 🌶️ | 2 tsp | Freshly ground preferred |
| Lemon Juice 🍋 | 1 tbsp | Freshly squeezed |
| Salt 🧂 | ½ tsp | Kosher or sea salt |
| Heavy Whipping Cream 🥛 | ¼ cup | For topping, optional |
| Powdered Sugar 🍚 | ¼ cup | For dusting, optional |
| Caramel Sauce 🍯 | ½ cup | Store-bought or homemade |
The cream cheese is non-negotiable here—full-fat Philadelphia brand melts the smoothest. Room temperature is key; pop it out of the fridge 30 minutes early. For the apples, Honeycrisp or Granny Smith hold their shape best during baking. Trader Joe's usually carries pre-peeled, but I always peel mine myself. The cinnamon should be freshly ground for that warm, toasty aroma—pre-ground loses potency fast. If you're in a pinch, Penzeys bulk bins have the best quality.
No vanilla extract? Vanilla bean paste works too, or even vanilla sugar at half the amount. Short on apples? Substitute with cooked apple sauce (unsweetened) at the same quantity. The caramel sauce can be swapped for salted caramel sauce if you love that extra kick. For the crust, graham cracker crumbs are a must—Honey Maid or Keebler work perfectly. If you want to get fancy, toast the crumbs with 2 tbsp brown sugar before mixing with butter for extra depth. The powdered sugar topping is optional but adds that bakery-style finish.
This dessert tastes even better the next day—store in an airtight container in the fridge for up to 4 days. For longer storage, wrap tightly in plastic and freeze for up to 3 months. Thaw overnight in the fridge. The crust stays crisp if you press it firmly into the pan before baking. I always make a double batch—one for now, one for later. The caramel sauce keeps in the fridge for 2 weeks, so buy extra if you're planning to drizzle.
Why You'll Love This Recipe
- No Baking Required: I swear by this recipe when I want dessert without the oven drama. Just mix the cream cheese, sugar, and eggs—then fold in that spiced apple pie filling. The texture stays silky, not grainy, and the graham crust holds up like a dream.
- Two Flavors in One: Honestly, the combo of creamy cheesecake and warm apple pie filling is genius. The buttery graham crust ties it all together, and that first bite? It’s like stealing dessert from a bakery, but way easier.
- Party-Ready in Minutes: Between us, this is my go-to for gatherings. No one suspects how simple it is—just layer, chill, and serve. The filling stays vibrant, and the graham crust gives it that rustic charm without the fuss of pie crust.
- Leftovers? Please.: I always make a double batch because the leftovers are that good. The cream cheese keeps it rich but not heavy, and the apple flavor doesn’t fade. Perfect for breakfast the next morning—just a sprinkle of cinnamon and you’re golden.
Step-by-step instructions for apple pie filling cheesecake
Create a perfect balance of spiced apple swirl and velvety cream cheese filling with these precise steps.
Prepare the Graham Cracker Crust
Preheat your oven to 350°F and melt the 0.5 cup unsalted butter in a microwave-safe bowl in 30-second intervals, stirring between each, until completely liquid. In a separate bowl, combine the melted butter with the 2 cups graham cracker crumbs and press the mixture evenly into a 9-inch springform pan, creating a firm base.
Bake the crust for 10 minutes until lightly golden. Press down with a fork to ensure it's fully set and remove from the oven to cool while you prepare the filling. The crust should be firm enough to hold its shape but still slightly soft for the filling to adhere properly.
Cook the Spiced Apple Filling
In a large skillet over medium heat, combine the 4 peeled, cored, and diced apples, 0.5 cup brown sugar, 2 tsp ground cinnamon, 0.5 tsp salt, and 1 tbsp lemon juice. Cook for 8-10 minutes, stirring occasionally, until the apples soften and release their juices, creating a thick, fragrant mixture.
Remove the skillet from heat and let the apple filling cool to room temperature. This step is crucial for preventing the cream cheese filling from curdling when combined later. The filling should be thick enough to hold its shape when spooned but still retain its vibrant color and aroma.
Mix the Cream Cheese Filling
In a large mixing bowl, beat the 32 oz room-temperature cream cheese with an electric mixer on medium speed until completely smooth and free of lumps. Add the 1.5 cups granulated sugar and mix until fully incorporated. Incorporate the 4 room-temperature eggs one at a time, mixing well after each addition to ensure a uniform texture.
Add the 0.5 cup sour cream, 2 tsp vanilla extract, and mix until fully combined. The batter should be thick and smooth, with no visible streaks of egg or cream cheese. If the mixture appears too thick, add 1 tablespoon of milk to achieve a pourable consistency, but avoid making it too thin.
Assemble and Bake the Cheesecake
Pour the cream cheese mixture evenly over the cooled crust in the springform pan. Using a spoon, create gentle swirls in the filling to distribute it evenly and create visual appeal. Spoon the cooled apple filling over the cream cheese layer, spreading it evenly across the top. Gently press down with the back of a spoon to create a marbled effect.
Bake the cheesecake in the preheated 350°F oven for 50-55 minutes, or until the edges are set and the center still jiggles slightly when shaken. Avoid overbaking, as the cheesecake will continue to set as it cools. The top should be golden brown, and the filling should be just set but still slightly wobbly.
Finish and Serve
Remove the cheesecake from the oven and let it cool to room temperature, then refrigerate for at least 4 hours, or preferably overnight. This step ensures the filling sets completely and develops its signature silky texture. Once chilled, drizzle the 0.5 cup caramel sauce evenly over the top, allowing it to cascade down the sides for a beautiful presentation.
Serve the cheesecake chilled, garnished with a dusting of 0.25 cup powdered sugar and a dollop of 0.25 cup heavy whipping cream on the side. Each slice should reveal layers of creamy cheesecake, spiced apple filling, and a buttery crust, creating a harmonious blend of textures and flavors.
Pro Tips For Making Apple Pie Filling Cheesecake
- Mix Cream Cheese Slowly: I learned this the hard way—dumping cold cream cheese into warm butter and sugar will give you lumps that scream "amateur." Beat the cream cheese first until completely smooth, then gradually add the butter and sugar while mixing on medium-low. This isn’t the prettiest method, but it’s the tastiest.
- Press Crust Firmly: Your crust’s job isn’t just to look pretty—it’s to hold that filling without crumbling. Press the graham cracker crumbs hard into the pan, using the bottom of a measuring cup to compact them evenly. No gaps, no weak spots. (Yes, even if you’re impatient like me.)
- Use Room-Temp Eggs: Cold eggs? They’ll turn your cheesecake filling into a lumpy mess that sets like glue. Let those eggs sit out for at least 30 minutes before mixing—just long enough to lose that fridge chill but not so long they get sticky. Trust me, this makes a real difference.
- Bake Low and Slow: Skip the urge to crank the oven to 350°F—this filling needs patience. Bake at 325°F for the full time (about 45-50 minutes), then turn the heat down to 250°F for the last 10 minutes. This prevents cracking and guarantees a creamy center. (Your future self will thank you.)
Essential equipment for apple pie filling cheesecake
Springform Pan Essentials
A 9-inch springform pan is non-negotiable for this recipe—it creates clean slices and prevents the filling from spilling over during baking. I recommend the Nordic Ware Natural Aluminum pan for its even heat distribution and easy release.
If you don’t have one, a 9-inch round cake pan works too, but remove the sides before serving to avoid a thick crust edge.
For a budget-friendly option, try the Wilton Springform Pan—it’s affordable and performs well. Always grease the pan thoroughly with butter or baking spray before adding the crust to prevent sticking. Trust me, a well-prepped pan makes all the difference in texture and presentation. 🧑🍳
Mixing Tools Matter
An electric mixer (like the KitchenAid Artisan Series) is ideal for blending the cream cheese filling smoothly, but a hand mixer works too. Avoid overmixing—just until the batter is uniform. For the apple filling, a nonstick skillet (like Calphalon) prevents sticking and makes cleanup easier.
I’ve ruined more apple fillings than I’d admit when using a thin, warped pan—stick to quality brands.
Measuring Precisely
Use a digital kitchen scale for the cream cheese and sugar to ensure accuracy—32 oz of cream cheese should weigh 907 grams (not 32 oz by volume). For the apples, a mandoline slicer (like OXO Good Grips) ensures even dices, which cook uniformly.
If you’re short on time, a sharp chef’s knife and steady hand work just fine, but don’t skip peeling—skin can make the filling gummy.
Swirl Tools for Perfection
A long-handled spoon (like a pasta server) or offset spatula helps create those signature swirls without disturbing the layers. For a more dramatic effect, use a skewer or toothpick to drag the apple filling through the cheesecake batter in a zigzag pattern.
The key is gentle pressure—too much force will break through to the crust below.
Baking Gear Upgrades
An oven thermometer (like Thermoworks) ensures your oven isn’t running hot or cold—350°F is critical for this recipe. For a restaurant-quality finish, invest in a drip pan (place it under the springform pan) to catch any overflow and keep your oven clean.
I also love using parchment paper under the crust to prevent sticking and make removal effortless.
Nutrition facts
Frequently asked questions
Can I make this dessert without a springform pan?
A 9-inch round cake pan works in a pinch, but you'll need to remove the sides before serving to avoid thick crust edges. For best results, use a springform pan or line a cake pan with parchment paper for easy removal. The layers won't be as clean-cut without one, but it's still delicious!
How do I prevent the cheesecake from cracking?
Cracking happens when the cheesecake bakes too quickly. Avoid opening the oven door during baking, and let it cool gradually at room temperature before refrigerating. Also, ensure your cream cheese and eggs are at room temperature before mixing. A water bath (placing the pan in a larger pan with hot water) can also help create a more stable bake.
Can I substitute the graham cracker crust?
Try a gingersnap crust for extra spice or a shortbread crust for a buttery, crumbly texture. For a gluten-free option, use almond flour or crushed gluten-free cookies mixed with melted butter. Just press the alternative crust firmly into the pan before baking to ensure it holds together.
Why does my apple filling look watery?
Watery filling usually means the apples weren't cooked long enough or were overloaded with liquid. Use firmer apple varieties like Granny Smith and cook them until they release juices but still hold their shape (8-10 minutes). If it's still too thin, simmer uncovered for another 2-3 minutes to evaporate excess moisture. The filling should coat the back of a spoon but still be spoonable.
How long can I keep this dessert in the fridge?
This cheesecake stays fresh for up to 4 days in an airtight container in the fridge. For longer storage, wrap it tightly in plastic wrap and freeze for up to 3 months. Thaw overnight in the fridge to preserve texture. The flavors actually improve after the first day as the apple filling melds with the cheesecake layers!